This year is the first holiday season that we’re not moochdocking (mooching a stay with family or friends) at home for the holidays.
While we’ve spent 4 Christmases in our tiny home on wheels, we haven’t had the opportunity to cook a Thanksgiving or Christmas dinner in our kitchen, because we’re always the guests!
But this year, we’re on our own in Florida, but you won’t find us at Denny’s or ordering take-out. Heck no! We cooked a full turkey dinner meal for two with NO OVEN!
Yep, we’re talking turkey, mashed potatoes, stuffing, rolls, and even dessert.

What We’re Working With Here
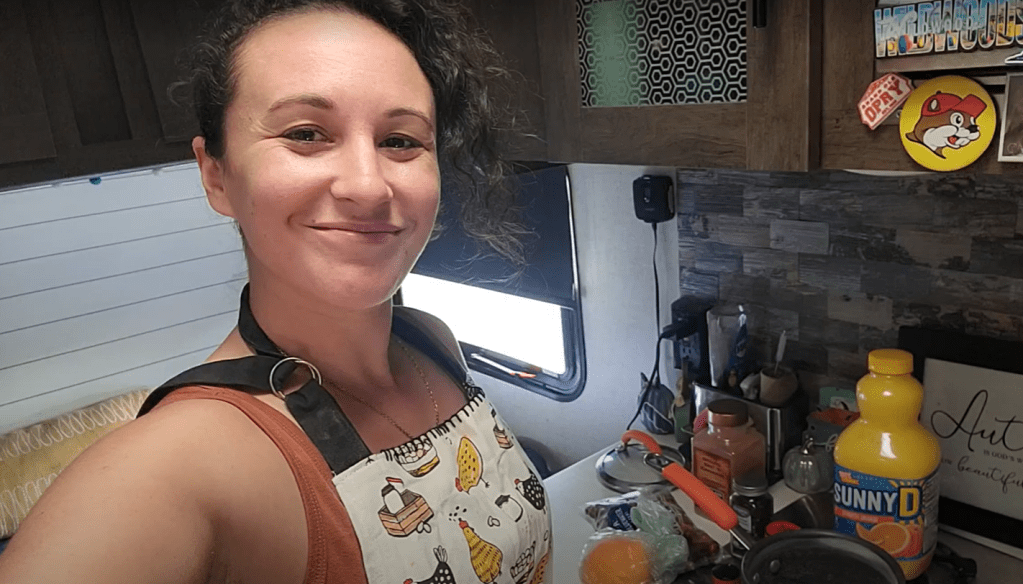
Our current RV is a 2020 Forest River EVO 178 RT. It’s a cozy little 17 foot toy-hauler with the basic necessities. To be fair, it was not designed to be lived in full-time. This is a weekend warrior’s rig. It’s got just enough to enjoy a weekend out with the toys.

A two-burner stovetop, no oven, and a couple of cabinets in the kitchen. That’s what we’re working with here.
With such little cabinet space, we aren’t able to travel with a slow cooker, air fryer, or Instapot.
So we only have our stovetop, a microwave, and a tailgate sized propane grill.
But Anthony is working a Christmas tree lot this year, so I’m left to fend for myself, and I’m no grill expert. So stovetop it is.
The Plan
Ok, here’s the strategy: We’ll prepare and cook over 3 days to be able to utilize just our three pots and pans we own, allow for flavors to meld, and certain things taste better the next day anyways.
What We’ll Need (Ingredients)
We’re cooking a turkey dinner with all of our favorites sides and fixings. This is a complete list of the ingredients you’ll need for this meal:
- Boneless Turkey Breast (pre-twined), if not buy twine
- Cheesecloth
- Kings Hawaiian Rolls (if you prefer)
- Pillsbury Dinner Rolls (you know the kind that’s in the cardboard can)
- 1 Orange
- Apple Cider
- Whole Milk
- 3 8 oz. Blocks of Cream Cheese
- 6 Sticks of Butter
- Fresh Rosemary
- 3 Golden Potatoes
- Graham Crackers
- Pumpkin Puree (can)
- Heavy Whipping Cream
- Cornbread Stuffing Mix
- 1 Onion
- Celery
- Hot Italian Sausage
- Chicken Broth
- 2 Containers of Cool Whip
- Pistachio Pudding Mix
- Mini Marshmallows
- Can of Crushed Pineapple
- Chopped Pecans
- 1 Bag of Fresh Cranberries
- Sunny Delight
- 2 15 oz. Cans of Yams (Sweet Potatoes)
- Vanilla Extract
- Brown Sugar
- Granulated Sugar
- Powdered Sugar
- Coconut Flakes
- Salt & Pepper
- Garlic Powder
- Cinnamon
- Pumpkin Pie Spice
- Allspice
- Dried Thyme
- Cloves
- All-Purpose Flower
How much did all of this cost:?
$153 between Trader Joes & Publix in Florida (2023).
Please note these ingredients are for Two Adults – adjust accordingly for your family!
Ok friends, here we go!
Day 1:
The key to a successful holiday dinner is planning ahead and planning smart.
What can I make now that will make the big day easier and will honestly taste better in a day or two anyways?
Dinner Rolls do taste amazing fresh out of the oven, but we don’t have an oven, so we opted to cook these a day or two in advance and just gently warmed them up as we served the meal. But if you’re a fresh roll kinda person and you have the extra time and pan, by all means go for it on Day 3.
This cranberry sauce tastes better a day or two later. It’s given a chance for all of the flavors and spices to meld together so definitely make this ahead of time.
Cranberry Sauce

Ingredients Needed:
- 1 Bag of Fresh Cranberries (4 cups)
- 1 Cup of Granulated Sugar
- 1 Cup of Sunny Delight “Orange Juice” (Can sub for regular OJ, just add extra cup of sugar)
- 1/2 tsp. of grated orange rind (or more if you’d like)
- 12 whole cloves
- 3 sticks of cinnamon
- Whole Allspice
Let’s start off with a throw everything into a pot kind of dish to warm up to the big show.
Steps:
- Rinse cranberries and toss any that have gone bad.
- In a small pot combine cranberries, Sunny Delight, and sugar.
- Pro tip: put these following ingredients into a small cheese cloth for easier removal, if not just add them to the pot to fish out later: cloves, cinnamon sticks, allpsice.
- Bring to medium heat and cook while stirring until cranberries have popped and you have a delicious thick sauce (about 10 minutes)
- Remove from heat and quickly remove cheesecloth containing spices or fish out the spices directly.
- Pour into a sealable container and put it in the fridge. That’s it!
Now I’d love to take full credit for this recipe, but it was actually inspired/tweaked by a recipe a former coworker of mine gave me back in my early 20s when I was recently married and had no clue how to cook.
God bless my ex-husband for surviving our first year of marriage off of frozen taquitos and hamburger helper.
If a 20-something year old who’s idea of cooking was reheating frozen pre-cooked food to an edible temperature can make this, so can you!
Dinner Rolls

No these are not homemade, and while there are recipes out there for easy homemade dinner rolls, I was not up for that challenge. I had enough on my plate as is.
So this is just a how to try to cook rolls on a stovetop in an RV using store-bought rolls kind of step.
Ingredients needed:
- Pillsbury Original Dinner Style Rolls Swirls
Steps:
- Open container of rolls and cut into 8 rounds.
- Line a cast iron pan with aluminum foil and heavily spray with cooking oil (to avoid burning the bottoms and sticking)
- Place rounds in the pan.
- Cover and cook low and slow.
- I cooked my rolls for about 30 minutes without the aluminum foil and the bottoms burned but the tops were cooked perfectly. I believe with the aluminum foil trick it should avoid the burning!
- Remove from the heat and store.
Alright friends, you’ve made it through Day 1. How are we feeling? Good.
Awesome, tomorrow we’ll move onto more side dishes and begin prepping the turkey!

Day 2:
Ok, things are starting to heat up now. Literally, it’s time to get cooking.
Mashed taters

Not to toot my own horn, but *toot toot* these mashed potatoes are life-changing and I’m pretty sure Anthony married me so he can eat these the rest of his life.
Warning: they are not waistline friendly, but it’s worth it. Don’t skimp out on me here and use skim milk, vegan butter, or some fake cream cheese. Go all in baby, ride this crazy train of carb-y buttery goodness with me for a minute.
Ingredients Needed:
- 3 Golden Potatoes
- Fresh Rosemary
- Whole Milk
- 8 oz. Cream Cheese
- Stick of Butter
- Salt & Pepper to season
- Garlic Powder
Steps:
- Take out cream cheese to bring up to room temperature to make it easier to mix in later.
- In a large pot, bring water to a boil.
- Rinse, then dice up potatoes with the skin on into sixteenths. (The smaller the size, the faster they cook which means less propane used!)
- Salt the water as it boils an add 2 to 3 sprigs of fresh rosemary to the pot.
- Add in potatoes and cook until fork tender.
- Strain potatoes and remove twigs of rosemary. (Some rosemary leaves will have come off the twigs while cooking, that’s good more flavor!)
- Add potatoes back into the same large pot.
- Add stick of butter & block of cream cheese.
- Add salt, pepper, and garlic powder to season.
- Mash away! Use a handheld electric mixer if you’re lucky enough to have one with you in your RV!
- Add splashes of whole milk to the mixture as you’re mixing to bring it to the consistency you prefer. The more milk you add, the more creamy and fluffy they’ll be.
- Sample, sample, sample the seasonings to taste. Good right?
- Then scoop that fluffy goodness into a microwaveable safe container to be reheated tomorrow. Cooking this a day ahead of time will allow all those flavors to sit and marinate a bit longer and they’ll taste even better the next day, I promise!
Watergate Salad aka Green stuff

The green stuff. You’ve probably had this at your Aunt’s house and had no idea what it as was called. This sweet and fluffy deliciousness is called Watergate salad, and no my friends, it’s nowhere near a healthy salad.
This is another super easy everybody in the bowl, no cooking recipe that’s ready in less than 5 minutes, and tastes even better the next day.
Ingredients needed:
- 1 Container of Room Temperature Cool Whip
- 1 Box of Pistachio Pudding Mix
- 1 8 oz. Can of Crushed Pineapple with Juice
- 1 c. Miniature Marshmallows
- Diced Pecans
Steps:
- It’s very important to remember to work with room temperature or cooled (not frozen) Cool whip.
- In a mixing bowl, combine full container of Cool Whip, 1 box of pistachio pudding mix, and pineapple WITH THE JUICE!
- Mix until pistachio pudding mix has dissolved and you have a beautiful green fluffy mixture.
- Add in mini marshmallows and desired amount of pecans (I prefer just a handful to keep this dish fluffy with just the occasional crunch).
- Pour into a sealed container and put it in the fridge. That’s it!
In my family we call this Green Stuff and my Tia (Aunt in Spanish) makes it every Easter, Thanksgiving, baby shower, you name it. It’s a staple at all our family gatherings and I hope I made you proud Tia!
No bake pumpkin cheesecake
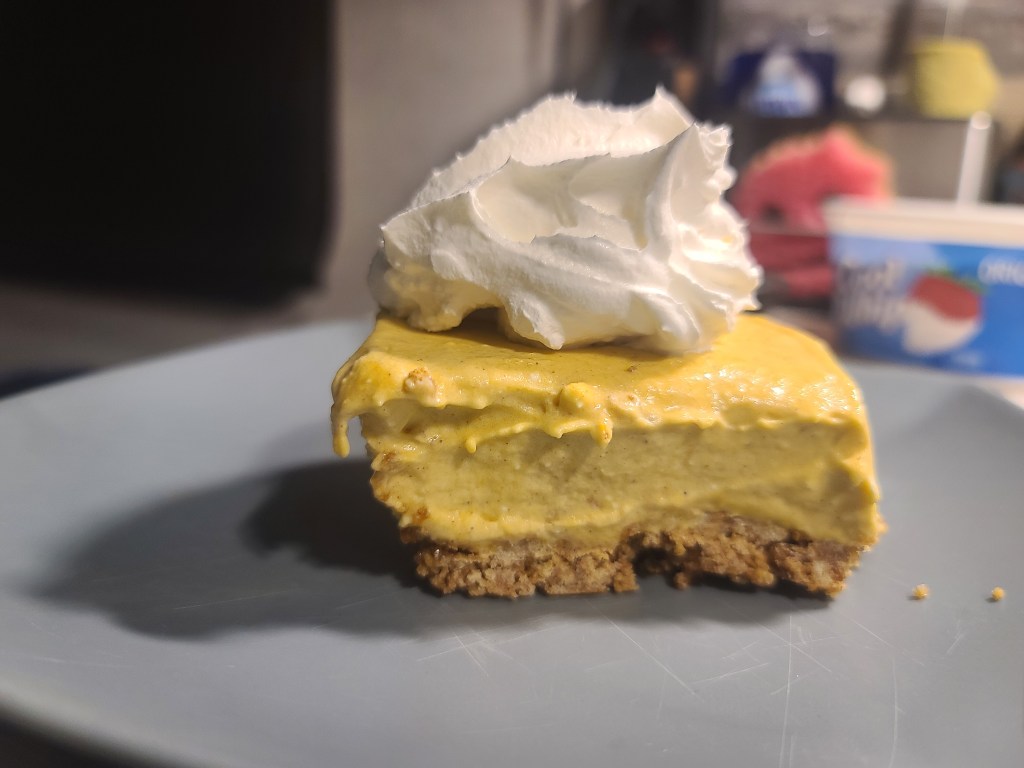
Love the taste of pumpkin pie around the holidays but don’t have an oven?
No oven. No problem. Enter: No-bake cheesecake.
Now to be fair, if you’re not a cheesecake fan, by all means, go to Costco and buy yourself the $6 pumpkin pie. It’s Costco’s gift to humanity. It’s delicious and honestly cheaper than buying the ingredients to make a pie these days.
But if you want to be like me and let your Ego run the show and say “Nay, I shall make a completely from scratch meal for my family this year because I’m awesome!” give this recipe a try.
Ingredients Needed:
- 1 Sleeve of Graham Crackers
- 3 Tbsp. Granulated Sugar
- 6 Tbsp. Butter
- 1 c. Heavy Whipping Cream
- 16 oz. Cream Cheese (At Room Temp)
- 15 oz. (1 Can) Pumpkin Puree
- 1 c. Powder Sugar
- 1 tbsp. Cinnamon
- 1/2 tsp. Nutmeg
- Pumpkin Spice
- 1 tbsp. Vanilla Extract
I know, that looks intimidating to the novice baker, but remember this is a no-bake recipe. We’ve got this.
Steps:
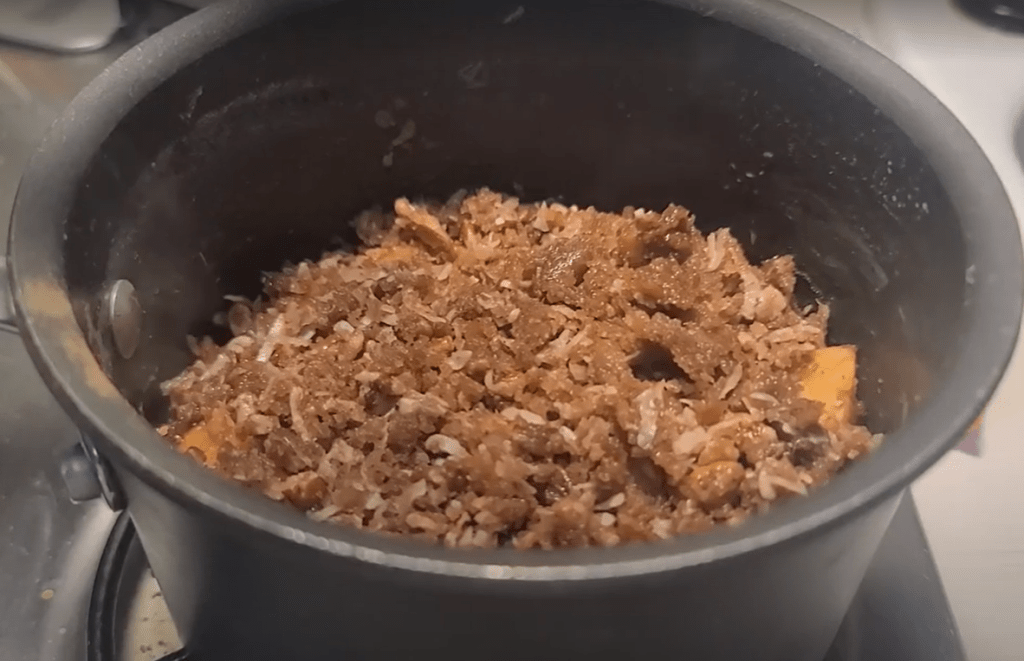
- Beat the heck out of some graham crackers. Sure you could use a food processer, but where’s the fun in that?! Maybe a family member gave you a hard time for missing the holidays. Take out some aggression by crushing a sleeve of graham crackers with a crab mallet and sealable gallon sized bag and go to town!
- In a medium mixing bowl, combine crushed graham crackers, 6 tbsp. of melted butter, and a sprinkle of cinnamon until the mixture resembles a wet sand consistency.
- Use a 8″ springform pan if you have one, or if you’re like me and don’t usually travel with a springform pan, any bread pan, cake pan, or even those aluminum containers you use to bring over to potlucks will do. Press the crumb mixture into the bottom of your container until the bottom is completely covered and it looks like a pie crust. Place this crust in the fridge to cool while making the pumpkin cheesecake filling. (Also, if you just want to go buy one of those store-bought ready to go graham cracker pie crusts, go ahead, I don’t judge).
- In another medium bowl, beat heavy cream to stiff peaks, and set aside. This would be a great arm workout or a great time to use one of those handheld electric mixers again OR as my bestie recommended one of those handheld milk-frothers I know you have for your fancy at-home coffee drinks y’all make.
- In a separate bowl, beat the cream cheese until it’s light and fluffy. Then add in pumpkin puree, 1 tbsp. vanilla extract, 1 c. powdered sugar, 1 tbsp. cinnamon, 1/2 tsp. nutmeg, and 1 tsp. pumpkin spice. Beat it until it’s beautifully incorporated.
- Then it’s time to fold in the whipped cream until it’s all combined.
- Pour the pumpkin cheesecake filling onto the chilled prepared pie crust and refrigerate overnight!
That’s it. See! Not bad at all right?! Tomorrow you’ll be be making room in those stretchy pants of yours to enjoy a slice of this no-bake pumpkin-y goodness.
A Prep Step: Brine the Turkey Breast

Want to know my secret to a flavorful and moist turkey?
Brining.
Yep. Brine your bird people! Whether that be a tiny turkey breast for two or a 20 pounder for the whole family, brine your bird.
In what? I use Apple Cider.
I know. It sounds odd but oh my goodness, it makes for an amazing fall flavor and it’s a game changer.
Now you’re going to want to brine your bird for at least 24 hours to allow it to soak in all of the flavors so do this as early as you can.
*Pro-tip: Make sure you have room in your fridge for your bowl containing your turkey! Even when I lived in a house in the suburbs with a full-size fridge, I can’t tell you how many times I went to put my bird and its bowl into the refrigerator to brine and went “Crap, where do I put it?!”. Plan ahead my friends.
Ingredients:
- Butterball Boneless Turkey Breast (Average size is about 3 lbs.)
- 64 oz (2 qt. container) Unfiltered Apple Cider
- Salt
- 1 Whole Orange
- 3 or 4 Springs of Rosemary
Steps:
- Take your turkey breast out of the wrapping. Be sure to leave the twine on the breast, this will help hold it together while we’re roasting it.
- Be sure to set aside the gravy packet it comes with too. If you’re a gravy fan, follow the directions on the packet and you’ll never go wrong.
- Place breast in large mixing bowl.
- In mixing bowl pour in 64 oz of apple cider.
- Add in sprigs of rosemary.
- Cut orange in half and squeeze the juice into the bowl and place the orange halves into the bowl as well.
- Salt the mixture heavily.
- Cover with aluminum foil and refrigerate overnight.
We’ll see you tomorrow.

Day 3:
Here we go friends, it’s the grand finale. It’s the big day.
For us it was Thanksgiving, but for you it may look like Christmas Eve, Christmas Dinner, hey maybe even New Years Eve if that’s your jam.
Let’s start off with something a little special and easy.
Cinnamon honey Butter

Yah, it’s the holidays. Who wants boring butter?
We’re making copycat Texas Roadhouse butter friends.
Ingredients Needed:
- Stick of room temperature butter
- 1 tsp. Powder Sugar
- 1 tsp. Honey
- Dash of Cinnamon
- Pinch of salt.
Steps:
- In a small box lightly whip butter until it’s almost fluffy.
- Add powder sugar, honey, cinnamon, and salt to butter.
- Mix together.
- Keep at room temperature for easy spreading.
Remember those dinner rolls you made the other day? They just met their new best friend.
Cornbread Stovetop stuffing

Ready for it to really smell like the holidays? It’s stuffing time.
I use the cornbread stuffing mix from Trader Joes. You can follow the recipe as it states on the box and it’s delicious. But since we won’t be able to stuff any of this stuffing into the cavity of a turkey like you would with a traditional turkey dinner, I like to “beef up” my stuffing, if you will.
Ingredients Needed:
- 1 Box of Trader Joe’s Cornbread Stuffing Mix
- 8 oz. Hot Pork Italian Sausage
- 1 Onion
- 2 Stalks of Celery
- 4 tbsp. of Butter
- 3.5 to 4 c. of Chicken Broth
Steps:
- In large pan melt butter.
- Add in diced onion and diced celery and begin cooking until onions are translucent and celery is almost tender.
- Add sausage, and make sure to break apart sausage while cooking (think taco consistency) and cook until fully cooked.
- In same pan and with the sausage, onion, and celery mixture still in the pan, add the seasoning mix to the mixture.
- Stir to combine.
- Now instead of adding water, add chicken broth! This will BOOST UP the flavor of the stuffing. Use 3.5 cups for a drier consistency or 4 cups for a more moist stuffing.
- Bring to a boil and then let it simmer for 3 – 4 minutes.
- Turn off the heat and add the cornbread croutons to the mixture and stir until fully combined.
- You can either keep this mixture in this pan if you have the extra pan to spare or put this mixture into a re-heatable container to warm up when it’s time to feast.
This is the best doctored up store-bought stuffing mix I’ve ever had and I’m sure your family will like it too!
Stovetop Sweet Potato Casserole
What’s a holiday dinner without sweet potatoes.
The best way to ruin nutritious sweet potatoes? Cover them in sugar. And that’s what we’re going to do my friends.
And I’m not just talking about throwing some canned yams into a pot and topping it with some marshmallows and calling it good. No, no, no. We’re leveling up this sweet side dish to become an instant family fave.
Funny enough, this dish was the first side dish I was ever asked to bring to a family holiday dinner. I was the rolls girl for the longest time, with none of my family members trusting me to be able to cook.
Look at me now y’all!
Ingredients Needed:
- 2 15 oz. cans of yams (sweet potatoes) in syrup
- 1 tbsp. of Maple Syrup
- 1/2 c. of Coconut Flakes
- Pumpkin Pie Spice
- 1c. Brown Sugar
- 2 tbsp. of Chopped Pecans
- 1 tbsp. of Vanilla Extract
- 2 tbsp. of Melted Butter
- 2 tbsp. of Cinnamon
- 1/2 c. of Miniature Marshmallows
Steps:
- Add 2 cans of yams and its syrup into a small pot.
- Add maple syrup, vanilla extract, dash of pumpkin pie spice, and 1 tbsp. of cinnamon to yams. Stir to coat the yams and begin cooking on low heat.
- Melt butter in microwavable dish/bowl.
- In separate small bowl, combine brown sugar, coconut flakes, chopped pecans, and 1 tbsp. of cinnamon.
- Add in melted butter and stir until makes a crumble.
- Pour crumble mixture onto yams in the small pot and continue cooking over low-medium heat.
- Cover and cook until crumble mixture is cooked and the yams are fork tender (about 20 minutes)
- Add desired amount of marshmallows on top of crumble and cover until marshmallows are melted.
Now this is an adaption of a recipe I use in an oven so the cooking times may vary. But man, I’m telling ya this dish is a winner.
Boneless Turkey breast

Ok friends, breathe. You’ve got this. It’s just a turkey breast.
How many times have you cooked a chicken breast on a stove top for fajita or chicken parm night, right?! Don’t be intimidated.
It’s time for the grand finale.
Ingredients needed:
- Brined Turkey Breast
- 1 c. of Chicken Stock
- 1 c. of Apple Cider (from brine)
- Orange Halves (from brine)
- Salt
- Pepper
- Garlic Powder
- Fresh Rosemary (from brine)
- Dried Thyme
- 2 tbsp. Butter
- 4 tbsp. Softened Butter
Steps:
- In small bowl, combine softened butter with salt, pepper, garlic powder, dash of dried thyme, and a few rosemary leaves. This is the mixture you’re going to slather all over the breast before cooking, so think the more seasoning the better.
- In a large pan, melt 2 tbsp. of butter over medium-high heat.
- Remove turkey breast from it’s brine and pat dry.
- Rub turkey breast with seasoned butter mixture.
- Sear turkey breast on each side for about 5 minutes over medium-high heat. This will create that beautiful crispy outside of the bird we’re used to.
- Reduce heat to medium heat and add 1 c. apple cider (from brine), 1 c. chicken stock, orange halves (from brine), and rosemary twigs (from brine).
- Place turkey breast back in the pan and reduce heat to as low as it can go. The key here is low and slow so check your propane levels y’all!
- Cover and cook for about 30 – 40 minutes until breast is cooked through. If you have a food thermometer with you, you’d want to insert it into the middle of the breast and it should be 165 degrees F.
- Remove the turkey from the skillet and cover. Let it for about 10 minutes.
- Slice and enjoy baby.
- If you’re a gravy fan, these skillet drippings will make some of the most flavorful gravy you’ve ever tasted!

My friends, you did it. You cooked an entire Thanksgiving/Christmas/Holiday Dinner for two (or more) without an oven in an RV.
You drive windy mountain roads. You battle headwinds on travel day.
You deal with campground power outages. You chop firewood on Tuesdays.
And now look at you, King or Queen of the RV Kitchen.
I’m so proud of you.

Would we love to have a bigger rig with an oven and cabinet space for our kitchen gadgets in storage? Absolutely.
Would we do this again? Absolutely.
We’re grateful for this chapter in our lives. We know someday we’ll have a bigger home with all the kitchen bells and whistles we could wish for. And I bet that because of this season of our lives, we’ll be even that much more appreciative of when that time comes.
We hope you found this blog helpful. We hope it inspires you to give this a try!
We hope you cook up some delicious food for your family this holiday!
Want to watch me make this meal from Step 1 to Chowing Down? Check out our YouTube below!:
From our family to yours, Merry Christmas & Happy Travels!
The Tiongsons


